Organizing your photo gallery is always tiring isn’t it? Here are 5 quick and simple tips to help categorize your photo gallery.
Are you tired of trying to find your way through thousands of photos in your photo gallery? Can’t find the photo that you need between selfies, memes, and photos of the books you would read one day? Then you’ve come to the right place.
In this guide, we are going to show you 5 time saving tips for categorizing your iPhone photo gallery so that you will be able to navigate through your photo gallery in the easiest way you can imagine.
Here are five time saving categorizing methods for your iPhone photo gallery:
1- Organize your photos with an iPhone Photo Gallery Cleaner

You probably have too many photos in your photo gallery that you don’t need. But you may not have enough time to categorize them.
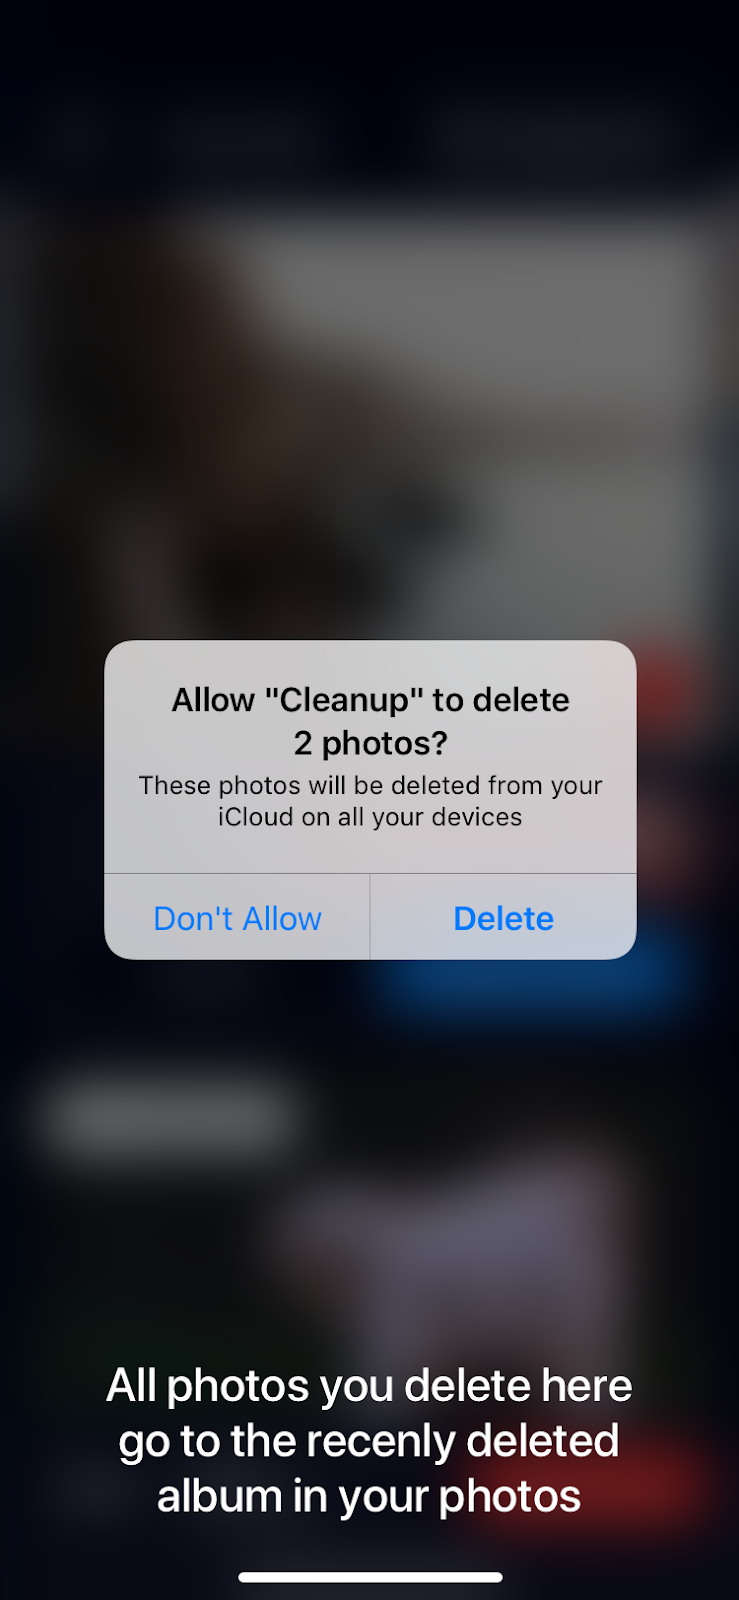
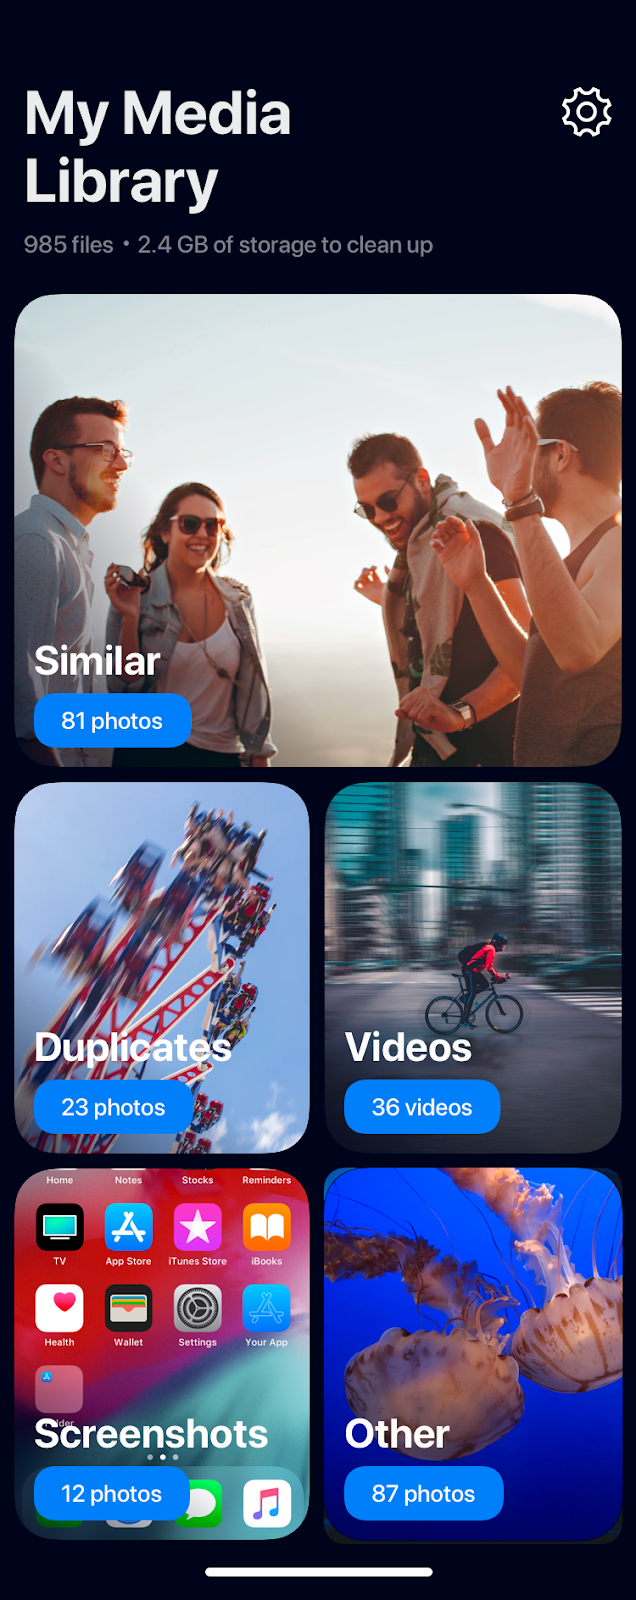
An iPhone photo gallery cleaner such as Cleanup can make this easy for you. Using Cleanup, you can quickly organize and clean your photos.
Plus, Cleanup has a smart algorithm that understands which photos you may want to keep. In a group of 10-15 photos that were taken on the same dinner table, Cleanup will suggest you to keep the good quality photos: the ones that you are directly looking at the camera, smiling and the camera wasn’t shaky. Such good quality photos will be displayed as the “Best result”, and Cleanup will suggest you to delete the rest of the photos that are very similar or even duplicates. All you need to do is briefly review this process and quickly get rid of dozens of photos that you don’t need?
Oh, and by the way, you can also clean your videos with Cleanup. You can even sort your videos by their size, and start your cleaning process with the largest file first.
2- Add your loved photos to favorites and delete the rest

You have taken many photos from different events of your life, but now you can’t find the precious one? To easily find photos that have a meaning for you, you can save them into the Favorites Album. Photos that are important to you can be added to Favorites by pressing the heart button under the photos. If you use this tip, you will find the photos you need quickly, instead of searching for hours.
Also, by getting rid of unnecessary photos, memes from old group chats, screenshots or those damned blurry selfies, you can simplify your life and organize your iPhone gallery.
Plus, this would also be helpful if you decide to follow our 5th tip and get yourself a free gallery cleaner to clean the mess since Cleanup keeps in mind the photos you favorited and won’t suggest them for removal.
3- Check The “Places” Album in Your Gallery
The additional helpful album is the “Places” album that shows your photos and videos on a map. By using “Search” and typing in the location you can find the photos or videos that are connected to it. Let’s say that you need to find the memories from your trips to Rome or Florence, just check this album or in the search bar just type “Rome” and you will find all your memories in a second.
4- Organize the “People” Album
The other important album is “People” It helps you find some photos in the gallery by a specific person’s name or face. iPhone automatically creates the folders with the people’s faces, then you can just go and name it. You need those photos that you’ve taken with your best friend to create a birthday collage? Just like the previous one, you can simply check the “People” album or search the name of the person you want to find.
5- Go Through the Automatically Created Albums

If you have over a thousand photos on your iPhone gallery, and don’t even know where they came from, scrolling through them to find one that you want can be a bit of a pain. iPhone automatically creates some albums, such as screenshots, selfies etc. You only need to manage these albums or just check them to find the photo you want to find. For example, once you take a screenshot of a drawing to use as a reference, you can find it in the “Screenshots” album.


